Contributing to the Website
Structure
The documentation effort is primarily divided into two projects, the website and the specification.
The website project contains the source code building up the website, all the graphic resources such as images and CSS, and the Tutorials. This is where you want to contribute if you want to write or improve one of the tutorials.
The specification is an OpenAPI document specifying the API in the tiniest detail. OpenAPI is both a human and machine-readable format and allows us to do a lot of cool post-processing stuff with it. The primary usage is generating the entire API documentation page, but it is also used to automatically generate the several language SDK’s we maintain. Once a new endpoint is documented it can be automatically updated on the website and in all the SDKs at once. This is where you want to contribute if you have found an error in the API docs or want to add a new endpoint. For more information, please see Contributing to the API.
Pre-requisites:
1. Cloning the repository
First, we need to fetch the project. Begin with “Forking” the project. This creates a copy which you can work on before submitting the changes back into the main project.
Second, we need to clone it to our computer. To do this it is recommended to use GitHub Desktop:
- Windows: https://central.github.com/deployments/desktop/desktop/latest/win32
- Linux: https://github.com/shiftkey/desktop/releases
Please follow the Getting Started with GitHub Desktop tutorial for how to clone the fork you just made.
Alternatively it is also possible to clone via terminal if you have git installed:
git clone git@github.com:YOUR_USERNAME/vrchatapi.github.io.git
2. Starting the local development server
The website is built with a blogging engine called Hugo. While we don’t use the typical blogging structure, Hugo allows us to include reusable modules such as the Navbar and Footer and define layouts for pages while writing the main content in Markdown. This significantly simplifies maintenance and contributing, as people only must learn Markdown rather than go digging in HTML.
Hugo is distributed as a portable binary and is already included in the project, so you don’t have to install anything. Simply run the following command at it will start a local webserver on http://localhost:1313.
./hugo.exe server
This will start a debugging server, which will automatically reload the page whenever you edit any of the files.
3. Create a new Tutorial
Being with creating a new post by running the following command:
./hugo.exe new tutorials/my-test-tutorial.markdown
We see a new file called my-test-tutorial.markdown with the following template copied in:
---
title: Tutorial Title
category: general
difficulty: easy
---
Proceed with changing the category and difficult and add some content.
Look for id’s in config.toml for which categories are available.
---
title: My Test Tutorial
category: javascript
difficulty: easy
---
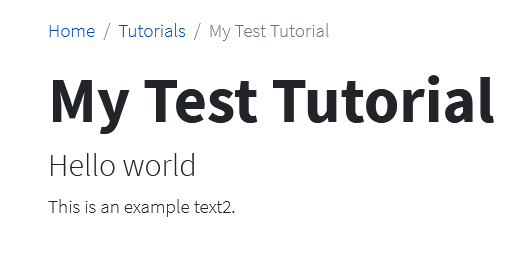
## Hello world
This is an example text.
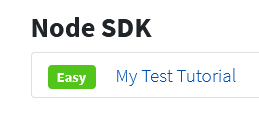
We now see it show up in the list of tutorials:
And the content of the Markdown file renders on the page. If you edit the tutorial file then the website should reload automatically. Please try edit it and see it reflected live:
4. Adding an Image
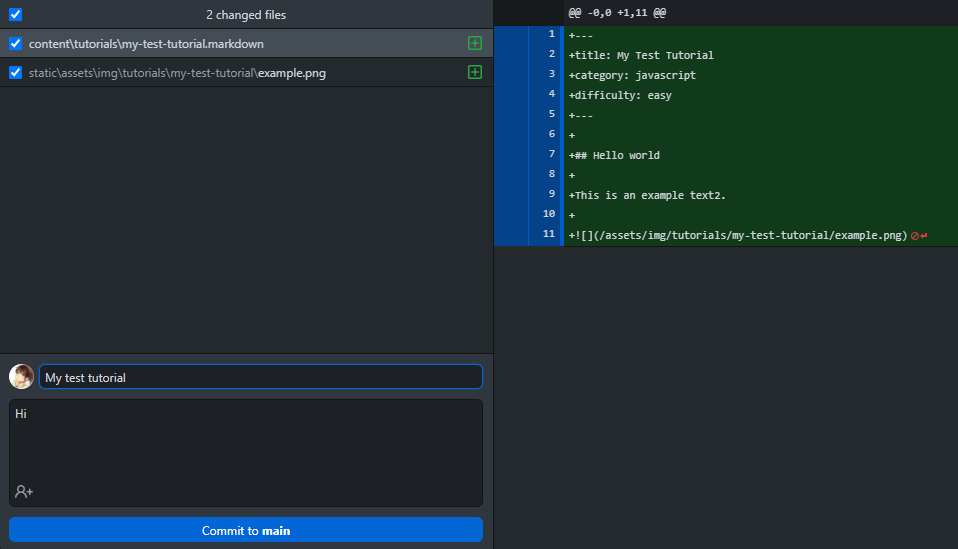
To add an image, start with creating a folder for the tutorial under static/assets/img/tutorials/ and must be named exactly the same as the tutorial file, but without the .markdown part, so static/assets/img/tutorials/my-test-tutorial. Then link to it in the post with the following syntax:

5. Contributing to the project
We are now ready to contribute back to the main project. Start with writing a title and description for the changes you’ve done. The title should be short and concise.
After making a commit, press “Push origin” to send it to your personal clone of the project on GitHub.
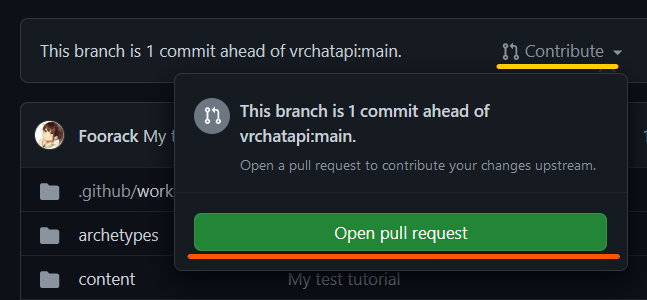
Finally we need to go to the the fork at https://github.com/YOUR_USERNAME/vrchatapi.github.io and click “Contribute” > “Open Pull Request”.
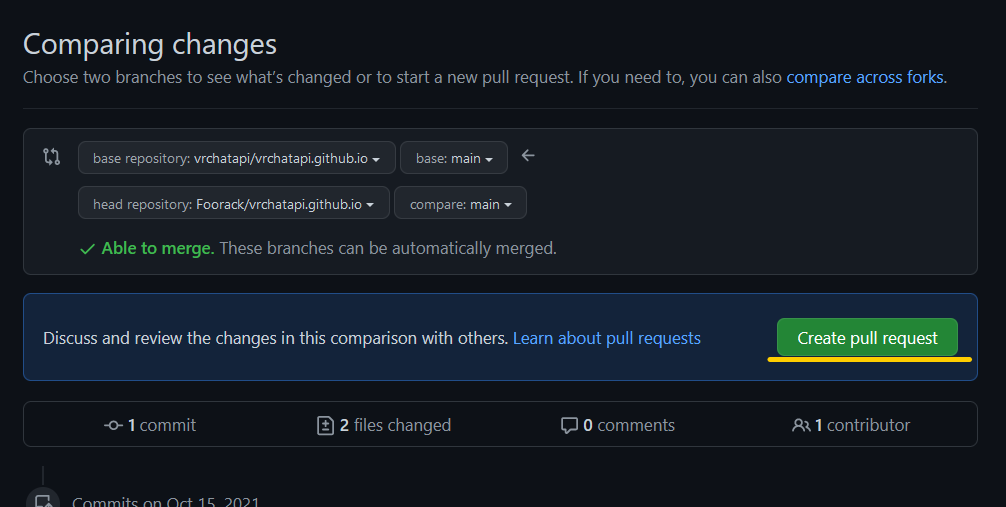
You will be shown a final confirmation page showing the difference, and that we are about to create a Pull Request from our personal form to the main repository. Click “Create Pull Request”.
That’s it! 🎉
Your PR will then be reviewed, and any requested changes can be updated in the same commit-push procedure as above.